Making Digital Copies of Negatives and Transparencies
by Jay Clawson
Introduction
As a photographer with decades-worth of color transparencies and negatives, I have been interested in exploring alternative methods to archive my film-based photography to a digital format. Since I no longer have a darkroom, I needed a way to transfer film to Photoshop that will allow application of my usual workflow for print output to an inkjet printer. For this purpose, I wanted to find the optimal method to achieve digital output up to a 15” x 20” print size from 35mm film.
In addition, since many of my transparencies are organized in Kodak Carousel trays for slide shows, it was important to find a copy methodology that would be quick and efficient to transfer slides to digital for computer screen viewing or digital projection. In this case, the quality objective would not be for print output, but would still result in sufficient resolution, contrast and color fidelity to look good on screen. This second purpose expanded the comparison scope to see if a simplified or cheaper method as compared to scanning would produce acceptable results.
Selected Copy Methods
- Flat bed scanner with transparency adapter. I have had previous experience with flatbed scanners, starting about 10 years ago with an Epson Perfection 2400 photo scanner, which had a native 2400 dpi scan capability. I found that the scan capability for 35mm negatives was fair for negatives, but somewhat limited for slides. For my applications, the Epson 2400 could produce fine prints up to 11x17 inch size for 35mm depending on the film – the scanner tended to emphasize grain on higher speed emulsions. However, for medium and large format negatives, especially B&W, this scanner could result in larger prints with fine results. For this comparison I used a later version Epson Perfection 4870 Photo scanner (street price around $500) which has a maximum native resolution of 4800 dpi. It also includes Epson-equivalent Silverfast software with Digital Ice technology for dust/scratch removal. The Epson includes holders for film up to 4x5 size.
- Dedicated film scanner. My first foray into film scanners began with the HP Photosmart 2400 film scanner for 35mm in the 1990’s. A similar version of this scanner is still available (street price around $180). It has a resolution of 2400 dpi. It produced similar results to the Epson model 2400 mentioned above. However, for this comparison I used a Plustek 7200 35mm film scanner (street price around $300) with a maximum native resolution of 7200 dpi and D-max of 3.3. It also includes Silverfast software with Digital Ice technology. Note: Dedicated film scanners are available for medium format and larger film for a considerably higher price. For most applications, a flatbed scanner is capable of producing excellent results for film larger than 35mm.
- Digital camera with special purpose copy attachment. I found a used zoom copy attachment with built in lens (typically available for $35 to $50 used) that was a common way to make duplicate slides in film days. Film duplicates were never equal to the original color slide, but were useful to protect the original from excessive handling and fading from frequent projection (Kodachome faded faster than Ektachome slides when to exposed high intensity projection lamps, although Kodachome had a longer dark-storage life). I reasoned that this method should produce a digital copy suitable for projection. This zoom copy attachment only allows 1:1 or cropped size copies with a full-frame DSLR. An off-camera flash or other suitable light source can be used.
- Digital camera with macro lens or close-up capability. This approach mimics method three above while using equipment that most of us have available. Importantly, it is not limited to a full frame DSLR as the digital copier.
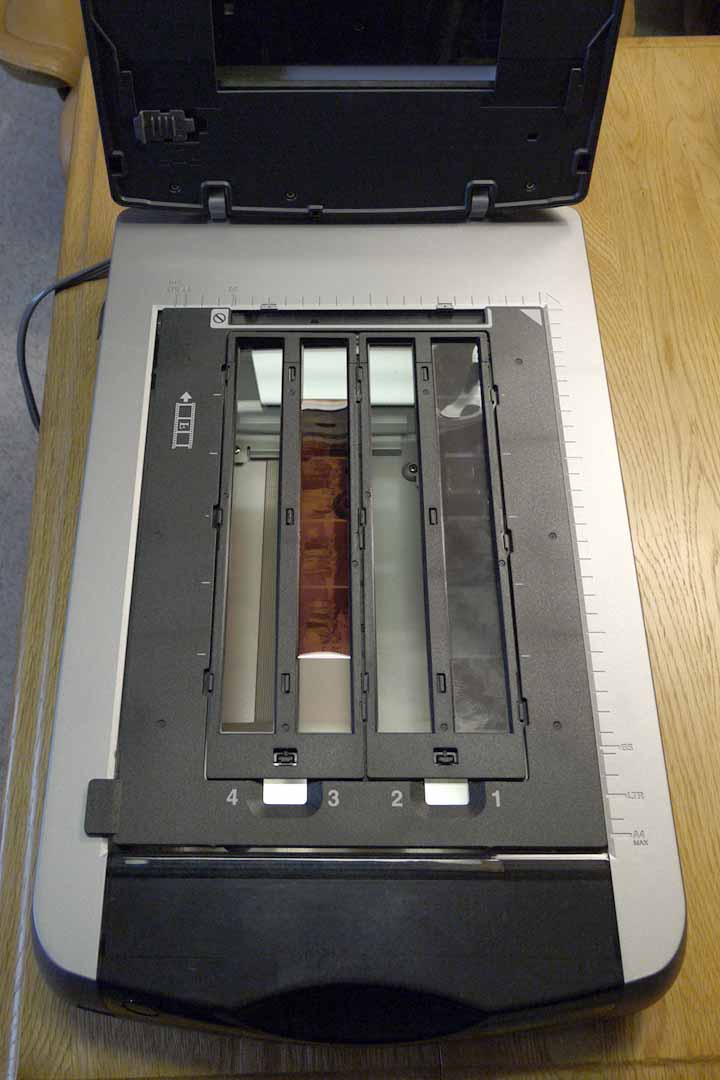
Epson 4870 Slide Scanner shown with 35mm film strip holder.
Also comes with holders for 35mm slides and larger film sizes up to 4x5.
Native 4800 dpi scan capability.
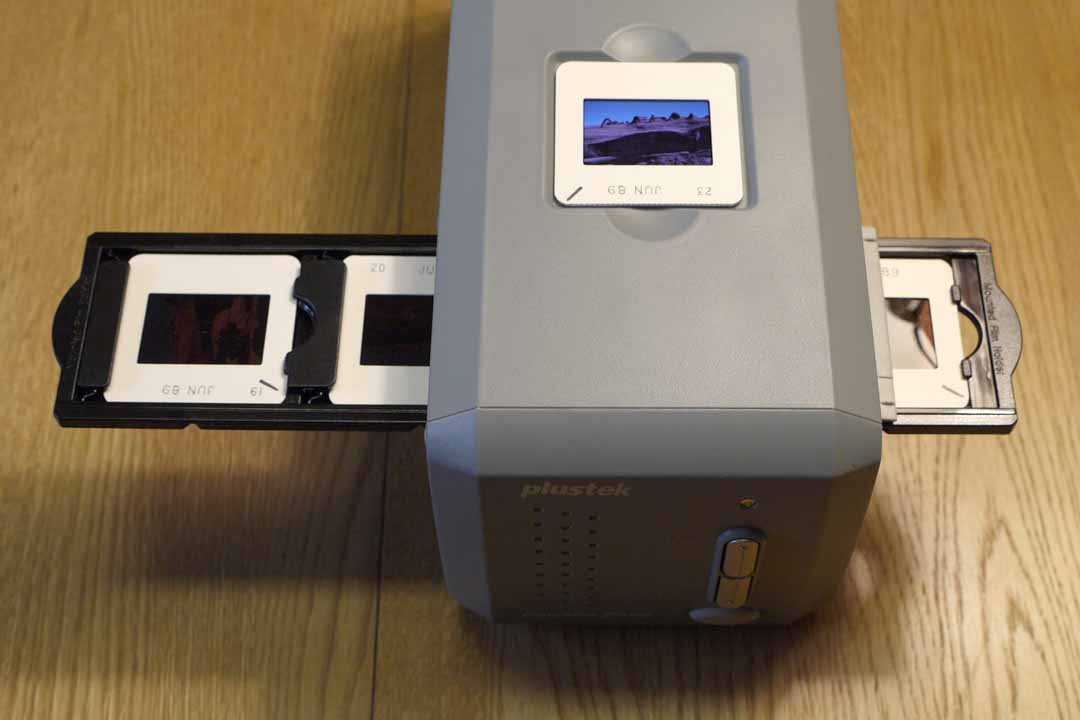
Plustek 7200 Optical Film Scanner shown with Slide holder.
Also comes with film strip holder. Native 7200 dpi scan capability.
This scanner is limited to 35mm film.
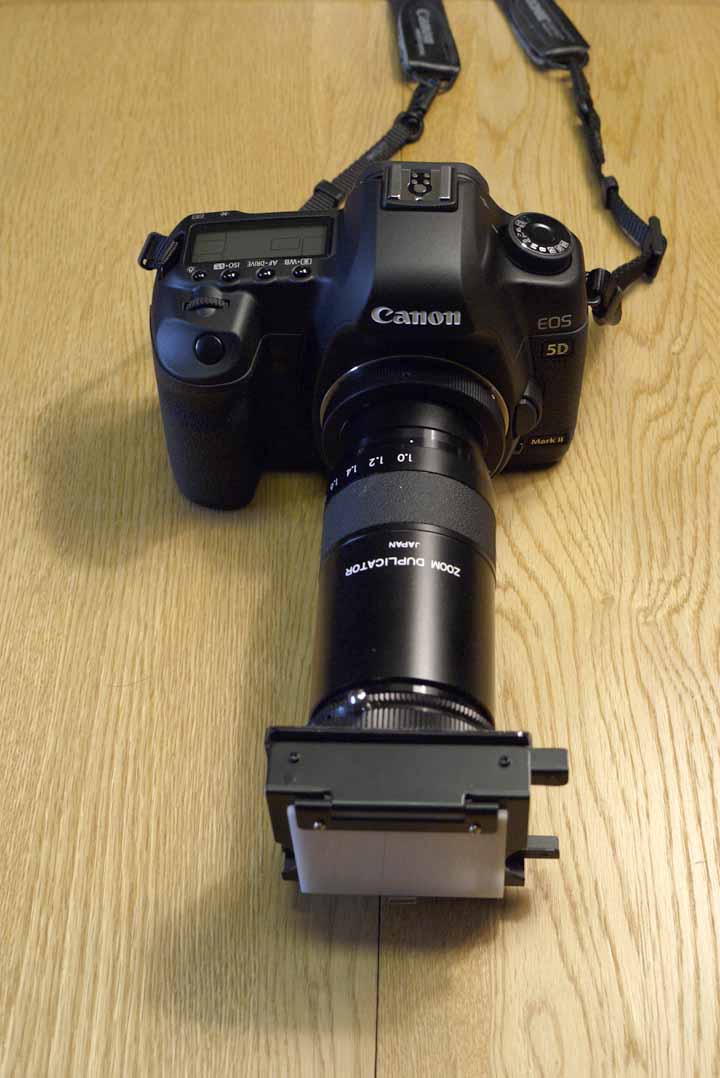
Canon 5D2 with Zoom Duplicator (1.0 to 2.0 zoom capability).
Originally designed for slide copying with film cameras.
For digital copy use, it is mostly limited to a full-frame 35mm DSLR.
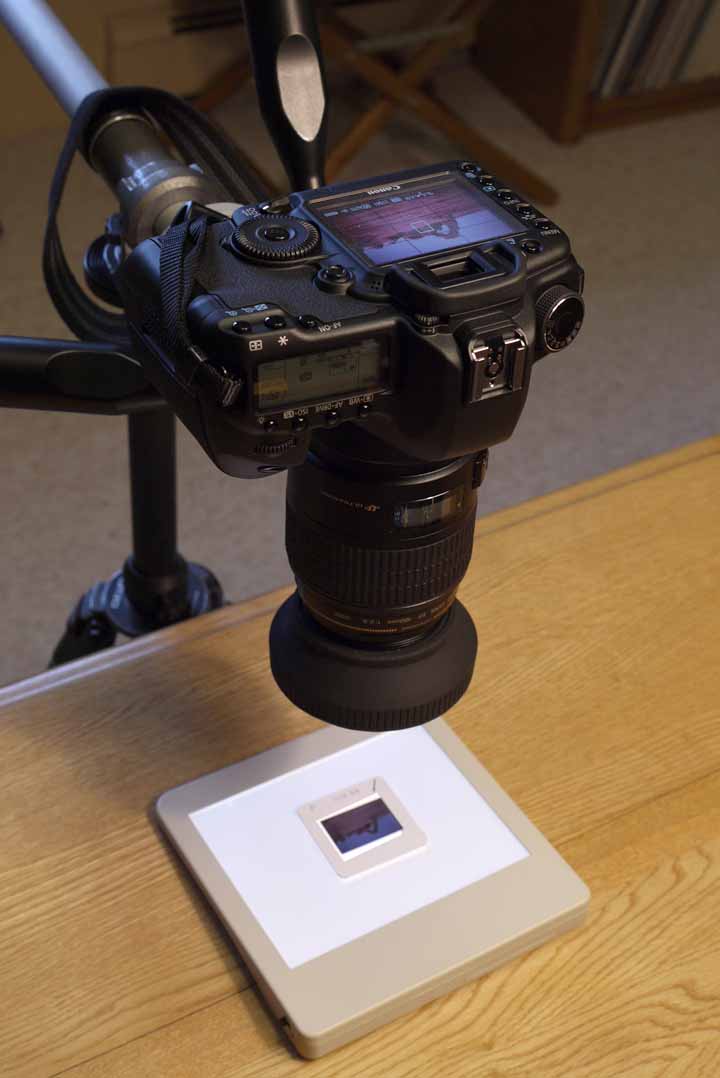
Direct copy setup using macro lens and transparency back light.
Also works with extension tubes, close-up filters, or other configurations
that can achieve 1:1 or higher magnification.
Any digital camera can be used.
Other Equipment Options
Other equipment systems are available for film to digital archiving that are basically equivalent to one of the above methods. A quick internet search found several inexpensive systems that might be considered for their efficiency or simplicity that achieve results comparable to at least one of the methods evaluated here. Two of these alternative equipment systems are shown below:
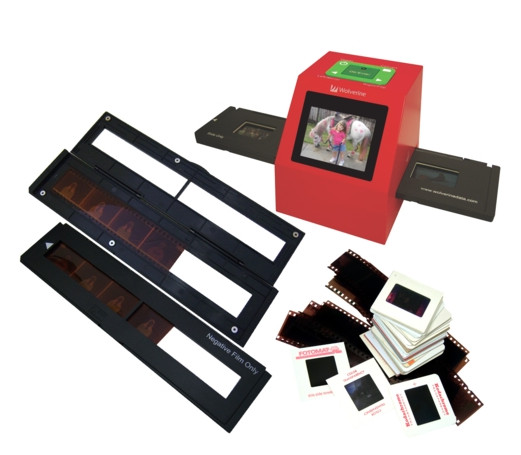
Wolverine
Film Copier (works with negatives and slides).
Produces an 8 megapixel file directly to a SD
card.
Available at www.wolverinedata.com for $99. Also available in
a 14 megapixel model for $129.
Note: This would be an
alternative to Method 3 above,
since it essentially a built in camera and not a
scanner.
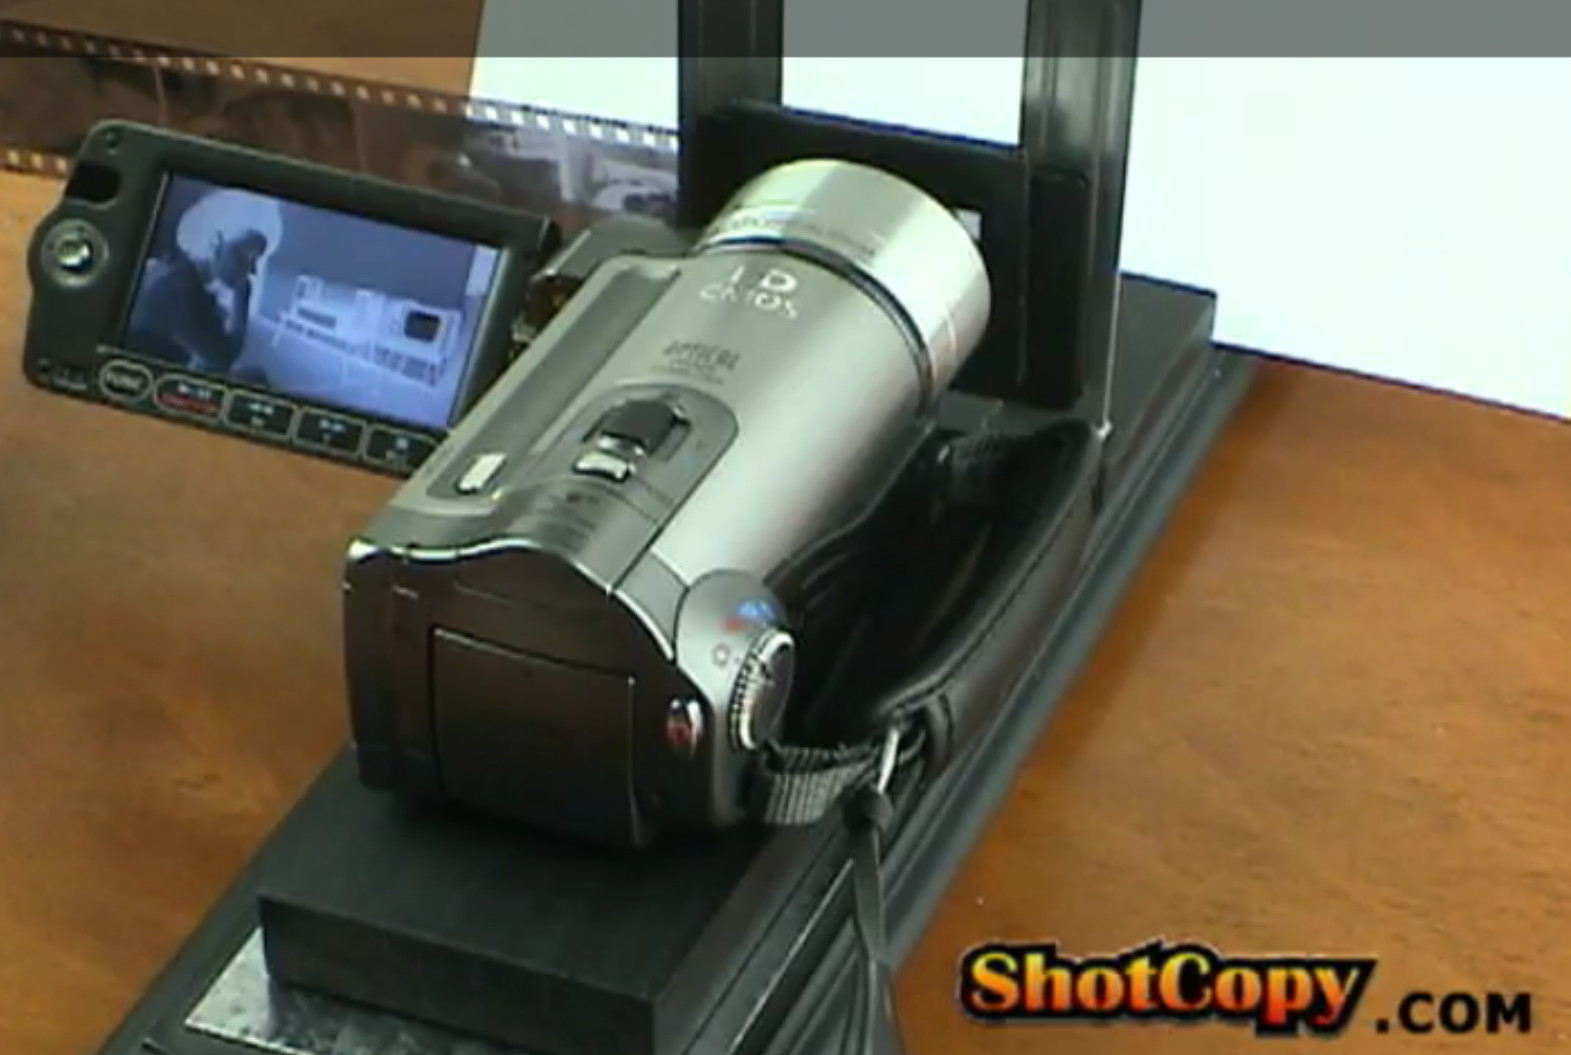
in just the right position in front of your digital camera lens so it can be
photographed for capture. A white reflector is used to illuminate the slides or
negatives from behind.“ Available at www.shotcopy.com for $59.95.
Note: This is a more sophisticated version for positioning
film than used for Method 4 above.
Copy Results
Four film images were chosen to represent the range of film that I anticipated using with these methodologies. The images and their application are outlined in Table 1.
| Image Name |
Film Type |
Digital Challenge |
Methods Applied |
|---|---|---|---|
| Botanic Gardens |
H&W Control Film. (A microfilm made by Agfa developed for continuous tonal range |
Essentially grainless film that should show the limits of resolution. Original darkroom print available for comparison | Epson Flatbed Scanner Plustek Film Scanner |
| Old Dodge Truck | Tri-Max film, developed normally | Determine the extent of grain impact on scan quality | Epson Flatbed Scanner Plustek Film Scanner |
| French Beach Scene | Ektachrome Slide | Maintain dynamic range and color fidelity | Epson Flatbed Scanner Plustek Film Scanner Zoom Duplicator Macro Lens Copy |
| Wedding Group Portrait | Kodak Gold 200 color negative | Maintain density range and color fidelity. Impact of film grain | Epson Flatbed Scanner Plustek Film Scanner |
Copy Method Evaluation
There are several variables that effect quality. These are the evaluation criteria deemed most important:
- Color Accuracy – For scanners the color can be affected by the scanning software so the evaluation considered the ease with which colors can be adjusted. For direct copy processes (the zoom duplicator and macro lens copy), the light source in conjunction with the in-camera white balance must be matched. While color can also be adjusted afterward in photo-editing software, my goal was to minimize rework by achieving an accurate color balance in the copy process.
- Dynamic Range – This is evaluated by comparing the resultant scan to the dynamic range of the original transparency.
- Resolution – The dpi resolution of the scanners varied from 1200 dpi to 4800 for the Epson scanner to a high of 7200 dpi for the Plustek scanner. Depending on the final application for the scan (print, projection, or archive), selection of the highest scan resolution for a one-size-fit-all scanning approach would not necessarily be best, since the highest scan quality can result in very large files. The following tables illustrate the resolution and file size variables:
| Scanner Resolution Settings |
Resulting Scanned Size (in Photoshop) | Native Print Size @ 240 pixels/inch | Jpeg File Size (High Quality) | Resolution Considerations |
| 1200 dpi | 5 mb | 4.5 x 7 inches | 0.3 mb | Good for small prints and projection |
| 3600 dpi | 45 mb | 13.5 x 20 inches | 1.8 mb | Typically the largest needed for most prints; also suitable for good up-resizing in Photoshop |
| 4800 dpi | 81 mb | 17 x 24 inches | 3.5 mb | Very high quality |
| 7200 dpi | 180 mb | 26 x 40 inches | 6 mb | Beneficial for super-size prints. (See resolution comments for film with high grain) |
(using Canon 5D2)
| 5D2 Image Quality Setting (jpeg Resolution) | Resulting Document Size (in Photoshop) | Native Print Size @ 240 pixels/inch | Jpeg File Size (High Quality setting saved in Photoshop) | Resolution Considerations |
| Small 5 megapxels |
15 mb | 8 x 12 inches | 2.1 mb | Good for projection and medium size prints |
| Medium 11 megapxels |
32 mb | 11x17 inches | 3.6 mb | Typically the largest size needed for most prints; also suitable for good up-resizing in Photoshop |
| Large 21 megapxels |
60 mb | 16 x 24 inches | 6.1 mb | Only needed for super-size prints. May be limited by copy equipment resolution (taking lens, etc.) |
Comparison – Plustek and Epson Scanners
The evaluation results below were arrived at by examining the scans (or digital copies) at 100% pixel size in Photoshop. Adjustments were made in Photoshop (version P3) for each image according to my normal workflow to achieve a fine art print. In some cases prints were made to determine how the 100% evaluation translated to actual prints. Prints varied in size from 6x9” to 14x20”; the smaller size prints validated overall color, contrast and general printability, whereas larger prints were made to determine if the digital conversion could be competitive with traditional darkroom/chemical prints or with recent digital images made with my previous reference, a Canon 5D.
- Color Accuracy – Both scanners produced a similar color palette. The on-screen comparison of the scans to the slide (when the slide is held up to a white patch on my LCD monitor) showed a very close color match.
- Dynamic Range – The Plustek had a slightly wider dynamic range than the Epson. The Epson appeared to have a higher inherent contrast and tended to blow-out highlights when the color slide had areas that were already on the edge of white.
- Resolution – Evaluation of the scanned images revealed several findings:
- At the highest resolution settings (4800 dpi for the Epson and 7200 dpi for the Plustek), the resultant images with color transparencies were very similar. In fact, the scans from the Plustek at 3600 dpi were extremely close in resolution to the 7200 dpi scan. For color transparencies the higher resolution of the Plustek is not that beneficial except for very large prints. Color noise in the Epson scans was more visible in the mid tones and shadows. Overall, the Plustek produced the better scan for color transparencies.
- Scans from both fine-grain and high-grain B&W film (Tri-X) showed significantly more detail from the 3600 and 7200 dpi scans made with the Plustek as compared to the Epson at 4800 dpi. The 3600 dpi Plustek scans had comparable resolution to the 7200 dpi scans, but the 7200 dpi scans had an overall smoother look. Scans from the Epson showed an overall softness at 4800 dpi that I found objectionable for most subjects.
- The appearance of film grain was not significantly different from either the Plustek or Epson scans made from fine-grain film. However, the appearance of film grain from Tri-X scans had completely different results between the Epson and Plustek scans.
- The Epson scans showed the least grain, but this was accompanied by an overall softness that was apparent in prints. I also tried making scans with the built-in USM with and without Grain Reduction settings in the Epson software. This improved the resolution while further reducing the grain, but the results were still far short of the Plustek scans. The tradeoff in resolution would be noticeable in large prints. One Tri-X negative had a scratch the length of the image that was obscured in the Epson scan. The scratch was fully resolved in the Plustek scan.
- The Plustek 7200 dpi scans showed less grain in the highlights compared to the 3600 dpi scans. It may be that the grain clumps in Tri-X and similar films show a blotchiness at lower dpi scans, whereas the higher dpi scans do a better job of separating the grain for a smoother appearance.
- For some images the Epson scan was preferable. This was the case with the wedding party negative. Although this was a color negative, I converted the output to B&W. For the portraits in this negative, the application of Dust Removal and Grain Reduction in the Epson scan produced a more pleasing, although softer, result. Having more than one scanning options does provide flexibility depending on the image.
- Scan times – At highest resolution, the Plustek took one minute and the Epson took approximately two minutes to complete a scan. Counting the time to dust and prepare a slide, the digital camera copy is the fastest way to do a batch copy process since it bypasses the need for the software interface and scan time. Use of Digital Ice, Noise Reduction, or Grain and Noise Reduction Elimination (GANE, applied with the Plustek) during the scan also adds to the scan time, but for simple comparison purposes I generally omitted Digital ICE from the workflow unless there were obvious problems with the negative. For other consideration, if batch scanning while maintaining high quality are important, some Nikon 35mm scanners have a batch loader accessory that can batch scan 40-some slides in an unattended mode. The Nikon Scanner has a maximum resolution of 4800 dpi. The batch accessory alone is costs considerably more than the Plustek scanner. (Note: Scanning speed varied with the power of the computer. Referenced scan times were done with a Windows Vista, quad-core 2.66 gigahertz computer with 4 gb of RAM. Similar scans with a slower laptop took over twice as long.
- Note: Some scanning software also provides for multiple scans of the same slide/negative to improve the dynamic range and scan accuracy. I did not attempt multiple scans, since it adds considerable time to the process (up to 10 minutes per finished scan). My research indicates that multiple scans can improve scan quality by increasing dynamic range and reducing noise by 10-20%, but it is not beneficial for all negatives and need only be applied for the most critical work.
- Color Accuracy – The copy process using the macro lens setup used the auto white balance (AWB) setting on the camera. This resulted in a very close color balance match to the film scans. For the zoom duplicator, I used an off-camera flash pointed to the white diffusion cover on the duplicator and set the camera white balance to “flash”. The resultant image was slightly warmer than the other copy methods. I considered the color balance to be acceptable, and if necessary, it could easily be adjusted in Photoshop.
- Dynamic Range – The digital copy made with the Canon 100mm macro lens showed higher contrast and slightly wider dynamic range. Highlights from the zoom duplicator were slightly washed out in comparison.
- Resolution –Two distinct evaluation findings resulted from the direct digital copy processes:
- Copies of the reference slide (Montlucon, France) were made at small (5mp), medium (11mp) and large (21mp) quality settings with a Canon 5D2 DSLR. For comparison purposes, the small- and medium-quality images were up-resized in Photoshop to the 23x17 inch native file size (@ 240 dpi) of the large-quality image. When they were subsequently compared at 100% magnification, the images looked amazingly similar. There was very little difference in noise or resolution, and it required 200% magnification to detect minor differences in favor of the large-quality digital copy. This suggests that the resolution/grain of the original slide was the limiting factor, and a 5 to 10 megapixel copy is sufficient for almost all purposes.
- The zoom duplicator is an inexpensive device with a built-in small fixed-aperture lens that is optimized for close-up work. However, the copy made with the Canon 100mm F2.8 USM macro lens had slightly more resolution and contrast. Considering that the new price of this macro lens is 10X the price of the duplicator, I consider the duplicator to provide excellent value if one does not already have a high quality copy/macro lens. It is possible to use supplemental filters or other non-dedicated macro configurations (e.g., macro settings on a point-and-shoot camera) to achieve similar results, but it would take some experimentation to determine if such combinations would be better or worse than the Zoom Duplicator.
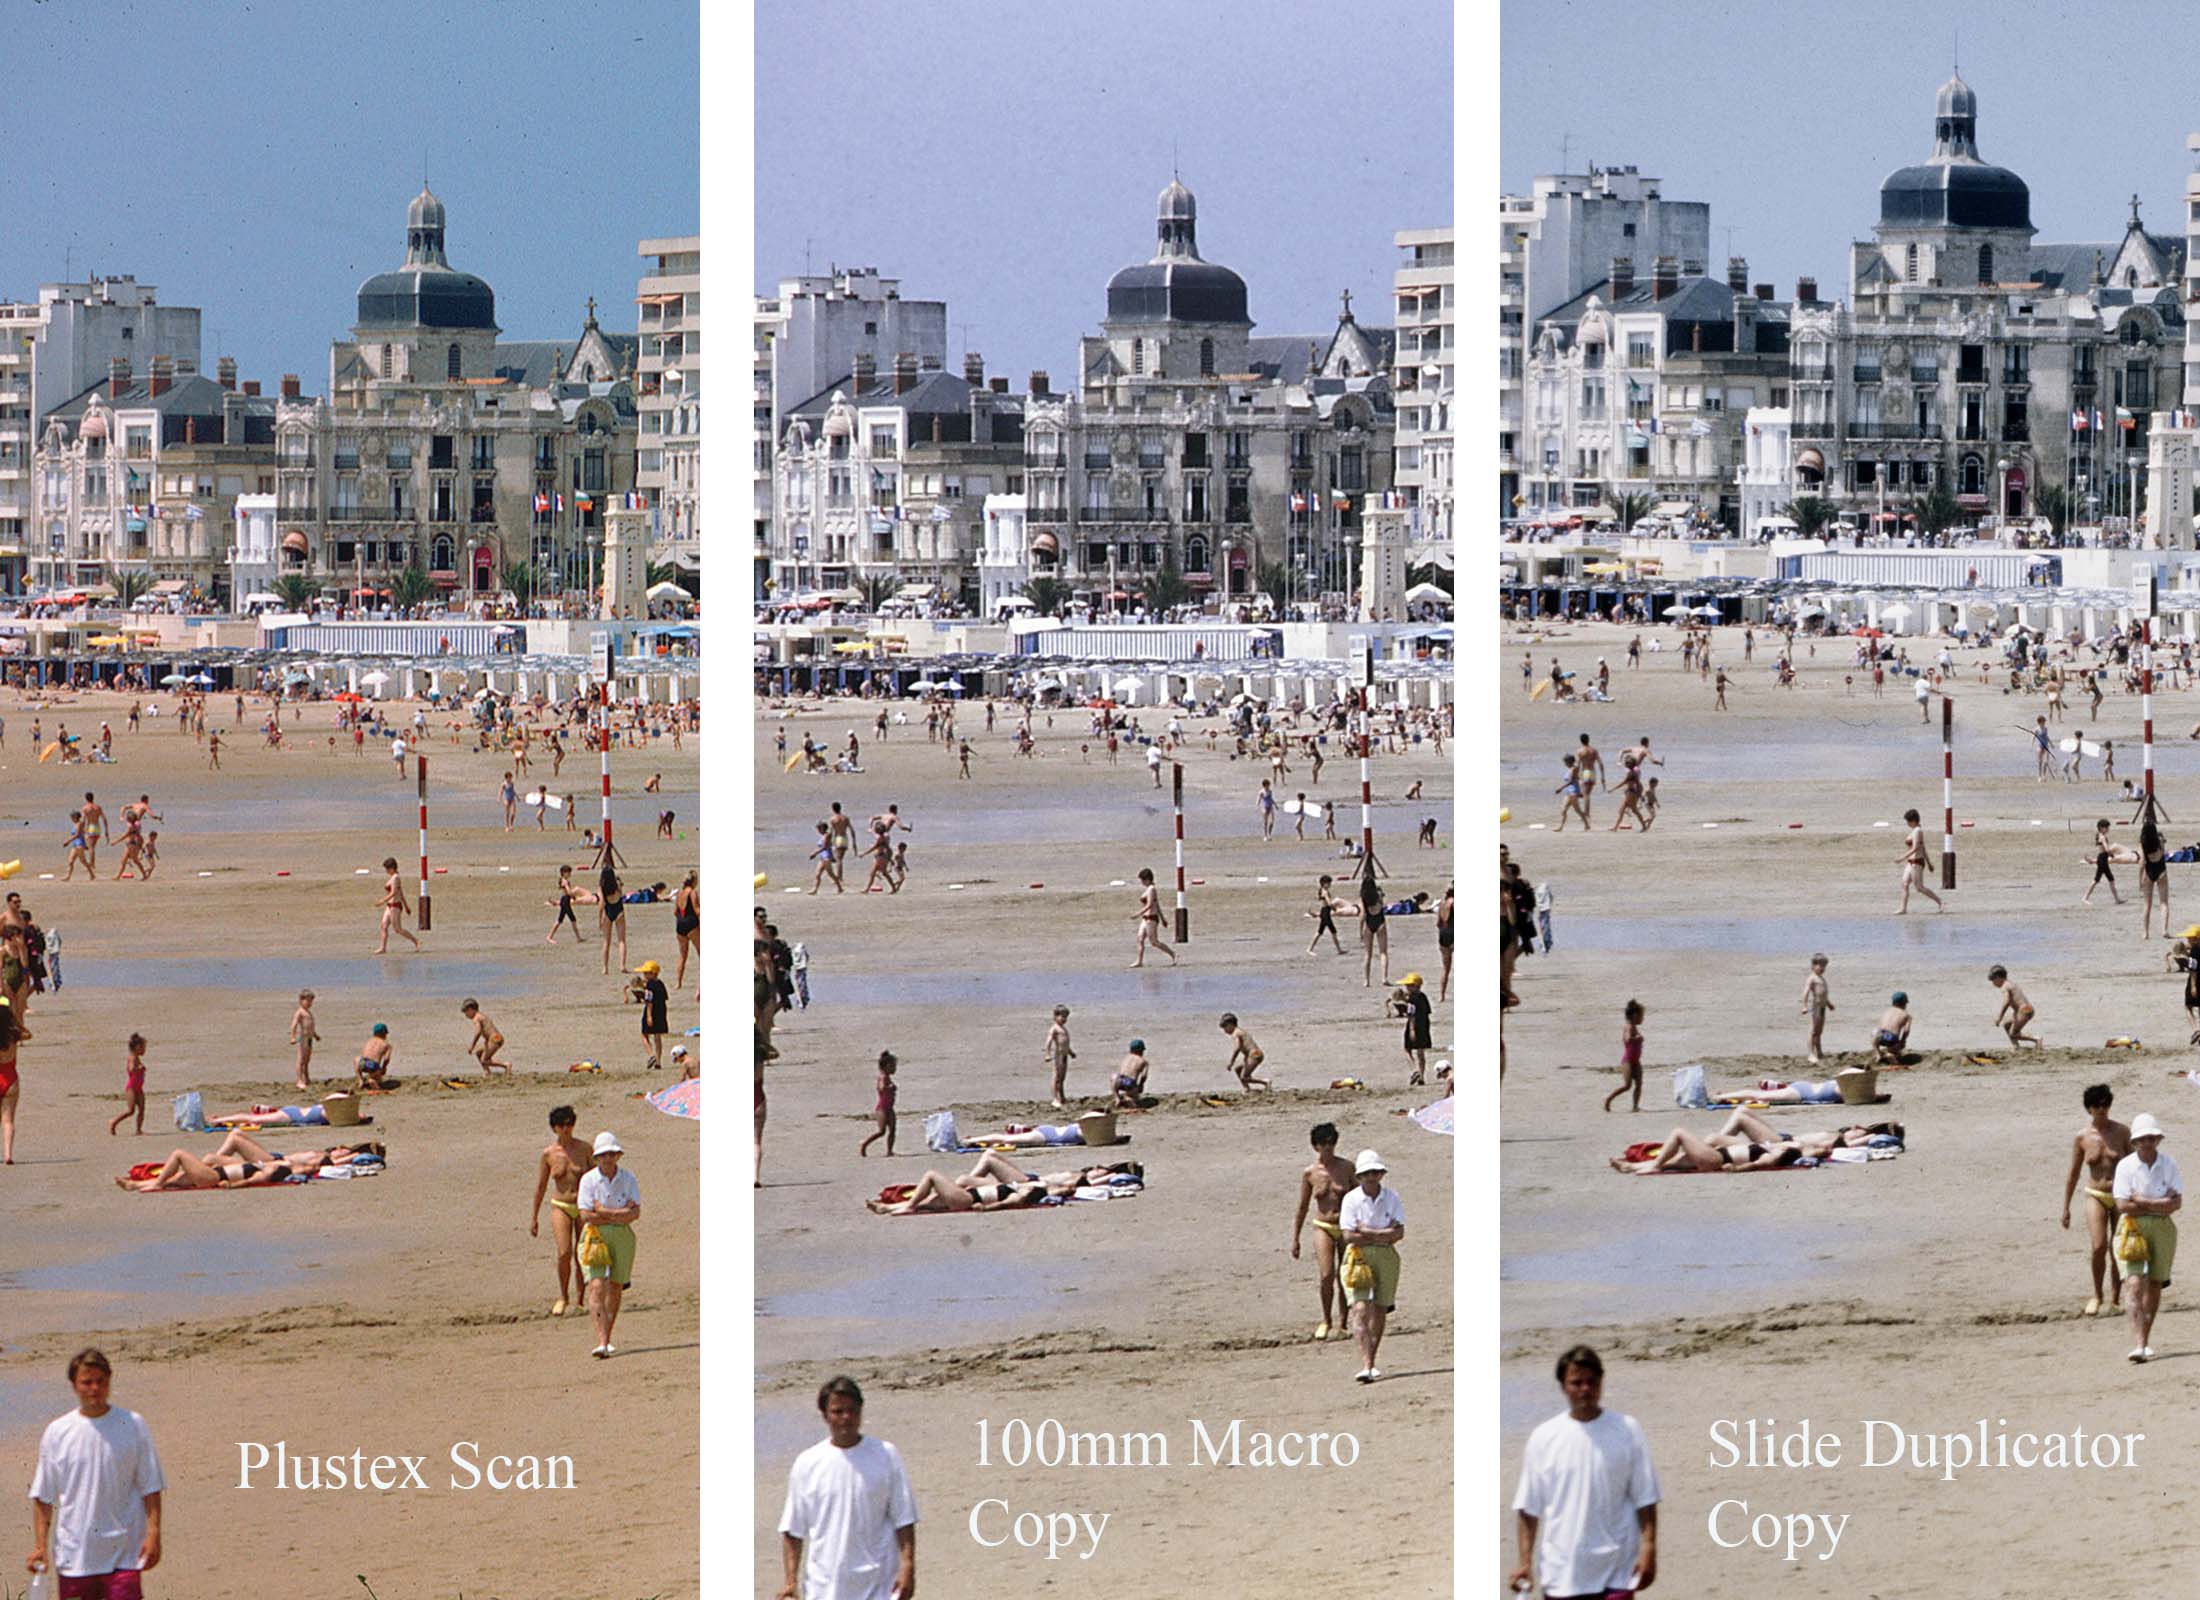
- The Plustex Scan shows the highest resolution of all, and the best dynamic range. Scanning software allows for large adjustments to color balance.
- The 100mm Macro Copy shows good resolution. Color balance can be adjusted in-camera or in post-processing of RAW files.
- The Slide Duplicator copy has acceptable resolution for small prints and for projection.
Since the direct digital copies were made only for transparencies, these comments only apply to that format.
- Color Accuracy – The color balance of scanned negatives can be selectively adjusted using the Silverfast scanning software. Film faded by age can be more easily be adjusted using this software. The Macro Copy and Zoom Duplicator are similar in color balance as noted earlier, and in this case changing the in-camera white balance (or in RAW file post processing) could probably achieve a very close match to the other methods.
- Dynamic Range – The scanning process allows more control of dynamic range, assuming that a high-quality scanner with high D-max is used. The direct digital methods will vary depending on the camera and settings used and the light source, but once the variables are optimized for the specific camera/copy setup, the dynamic range can come close to the scanner results.
- Resolution – The
direct digital copies were surprising
good from a resolution standpoint. However, camera and film must
be precisely adjusted to keep the camera sensor and film planes
perfectly parallel - any slight misadjustment will result in
out-of-focus areas that cannot be totally compensated for by using a
small f-stop for increased depth-of-field.
Conclusion
There are a numerous variables in scanning film as discussed in the evaluation section, primarily:
- B&W negative and color film produce different results than color transparencies. This can affect the method chosen for the copy process based on the end use of the digital copy.
- The inherent grain of the film has a major impact on the scan results. Some scanning software can apply noise reduction and/or dust and scratch removal (Digital Ice and GANE were two proprietary applications of this technology used with the subject scanners). Depending on the image, these technologies were sometimes beneficial, and at other times detrimental to the image, again depending on the end use of the image
- For copying 35mm transparencies, a 5 to 10 megapixel camera is sufficient to capture the detail using a direct digital copy process. Using higher size files has limited benefits. Based on these results, the Wolverine Film Copier© noted in the introduction, which has a built-in 8 (or 14) megapixel camera, should be more than sufficient for copying transparencies
For my own purposes, I ranked the four methods in this order for general and specific applications:
- The Plustek scanner, dedicated and designed for film only, produces the best overall scan quality for 35mm negatives, especially for negatives with low grain and high resolution. It produces files with the highest resolution and dynamic range and is suitable for making large fine-art prints from any film type.
- The Epson flatbed scanner, as a dual purpose device for reflective and transparent images, does a reasonable job for 35mm, but has less overall resolution than the Plustek. For film with low inherent grain and for suitable subjects (e.g., portraits), this may be a desirable application for the scanner. The Epson also minimizes imperfections in negatives that are severely scratched or require restoration. This scanner produces excellent files for medium and large format film since the resolution scaling is not as critical for larger film sizes.
- The macro copy setup, which used a Canon 100mm macro lens for this evaluation, produced excellent copies of transparencies for projection and for small to medium prints. The ShotCopy© equipment noted in the introduction, appears to be an inexpensive jig that provides convenient positioning of negative/transparencies, and it may be a worthwhile investment if one has a lot of images to copy.
- The Zoom Duplicator is convenient and does a decent job of copying slides. Considering the cost, it is a bargain, but it does require a full frame DSLR for 1:1 copies.